Check out these five tips for creating and saving a customized report on Reportei
One of the main benefits of Reportei‘s third version (2019) is that you can create a customized report for each of your projects.
On Reportei, you can add or remove metrics, reorganize data and social media accounts, and even save your templates to reuse with the same client or others. Amazing, right?
Best of all, making changes is both quick and practical, and you can do it anytime.
Here are five tips for using Reportei to create and save a customized report. Keep reading to check them out and clear up any questions you may have!
1. Adding and removing metrics
One of the main features released along with the third version of Reportei is that you’re free to add new metrics to your reports and remove others at will.
As you might be aware, when you generate a tree-second report, it comes with a standard layout. This layout contains data that is the most relevant to each integrated social media account.
But we know that every project is different, and each requires a customized analysis of results.
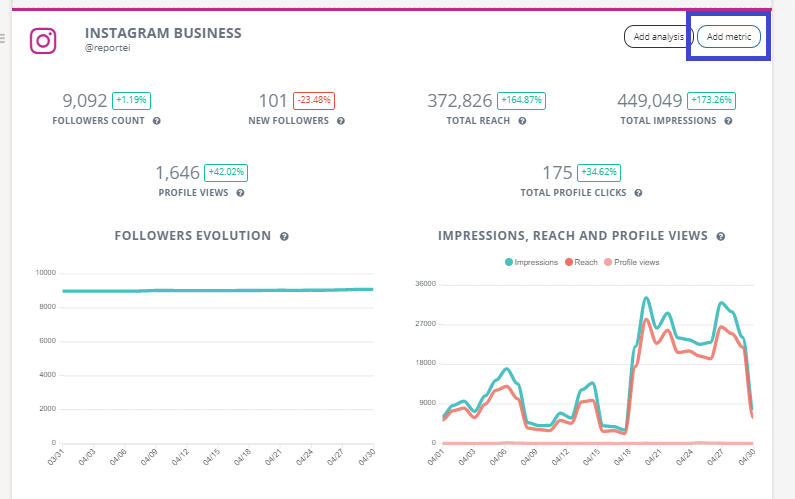
You will find the add metrics button at the top right corner of every report or fixed to the bottom bar on the app. By clicking it, you can analyze all the data your client finds relevant, which doesn’t show up in the standard template automatically.

On the other hand, if you need to remove irrelevant data that doesn’t contribute to moving your project forward, all you have to do is tap the recycle bin icon. You’ll find one at the top right corner of every metric.

Once you’ve done that, simply reorder the data in the layout, as we’ll show you in the next section. And don’t worry! You can save your template for future use.
2. Customize the metric layout
When you’ve decided which metrics to include in your customized report, you can organize them according to what your decision-maker considers most relevant.
You can choose what data to highlight and create an exclusive template, replicate it as many times as you’d like, and use it for other clients as well.
To resize metrics and charts, use the + and – buttons at the top right corner of each one.

If you’d like to reorganize data, all you have to do is find the button at the top left corner of each metric and click and drag the board to wherever you’d like to position it.
3. Add an analysis in text or video format
Open analyses have been around since the first versions of Reportei. They give you room to interpret results and give your clients detailed information on their projects.
If you want to add an analysis, click the button at the top and bottom of every report. You can add as many as you’d like and attach an explanation to each result.
It’s important to point out that you don’t only have to use text. Many of our clients use video analyses to present data remotely or images to complement relevant information.
Besides, open analyses are essential to clear and effective communication with your client.
4. Reorder your social media accounts
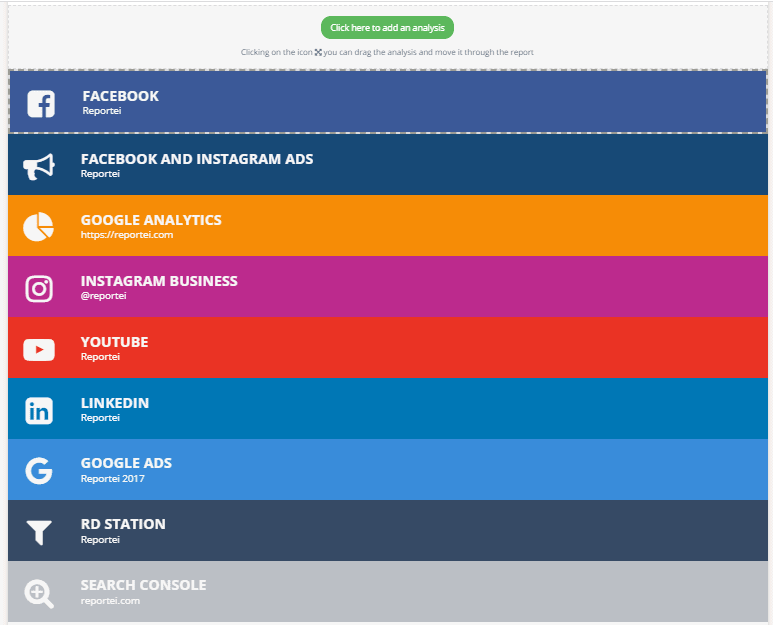
When you generate a report automatically, social media accounts come in a standard order. But you can reorder them whenever you need to.
This feature helps you structure data according to what you consider relevant to your project and the data that your client is interested in following.
To reorder your social media accounts, simply click on the button at the bottom left of a report and drag it up or down, as the following images show:

5. Save your customized report template
Do you like one of the exclusive templates you created for your client? How about saving it for future reports or even to use in other projects?
This feature helps (a lot!) when it’s time to create new templates, and you can use your layout for any of your clients’ projects.
The save as a template button is available on the lower bar of the app. Once you’ve clicked it, fill out a title to help you find it later, then click on save a new template.
To reuse it, all you have to do is access the create area of a new report and, instead of selecting customizable, choose one of the templates displayed in the list.
Was it helpful to read about how to generate a customizable, detailed report using Reportei? Then, there’s no time to lose! Access your account or register to try out these features and change the way you communicate with clients!


